
Table of Contents
Introduction
Ever struggled to add a video or image to Canvas and wondered why it won’t appear correctly?
Learning how to embed media on Canvas can make assignments, discussions, and course pages much more engaging. For beginners, Canvas can feel confusing when different media options appear in different places.
The good news is that you usually don’t need advanced technical skills. Canvas provides simple tools through its Rich Content Editor (RCE) for adding videos, images, audio, and other media.
In this guide, you’ll learn how to embed video on Canvas using the built-in options. We’ll also cover how to embed YouTube videos, add media to assignments, and troubleshoot common problems.
By the end, you’ll know which method to use and where to find each option. You can follow the steps confidently, even if you’re new to Canvas.
What Does “Embed Media” Mean in Canvas?
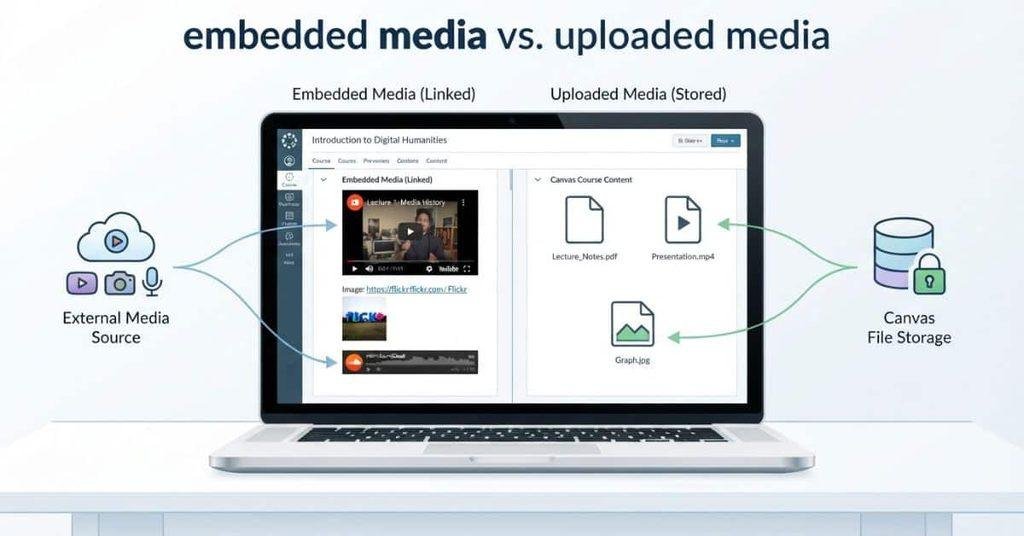
Embedding media in Canvas means placing a video, image, audio file, or other supported content directly inside your course content. Instead of making students open a separate file, the media appears within the Canvas page or activity.
For example, an embedded YouTube video can play inside a Canvas assignment or discussion. An embedded image can appear directly beside your written instructions. Canvas usually handles these options through the Rich Content Editor (RCE).
The exact media tools can vary by course settings and institution. Your instructor or school may also restrict certain embedding options.
If you are submitting a recorded video for an assignment, learn how to post a Kaltura video to a Canvas assignment for the submission process.
Embedded Media vs. Uploaded Media
The main difference comes down to where students view the media. When you upload a file, Canvas stores that file as course content or an attachment. Students may need to click the file to open or download it.
When you embed media, Canvas displays it directly within the content area. This creates a smoother experience because students can often view or play the media without leaving the page.
| Upload | Embed |
|---|---|
| Adds a file to Canvas | Displays media inside Canvas content |
| Often requires opening the file | Often allows viewing directly |
| Works well for documents and attachments | Works well for videos, images, and audio |
For example, uploading an MP4 may give students a file to open. Embedding a video can place the player directly in the assignment.
Where Can You Embed Media in Canvas?
Canvas uses the Rich Content Editor in several common course areas. Depending on your permissions, you may be able to embed media in:
- Assignments — Add videos, images, or audio to assignment instructions or responses.
- Discussions — Include media within discussion posts and replies.
- Pages — Create lessons or resources with media placed directly in the content.
- Announcements — Add embedded media when your course allows Rich Content Editor features.
- Other RCE areas — Some Canvas tools provide media options through the same editor.
Pro Tip: Look for the Rich Content Editor whenever you need to add media inside Canvas content. Its toolbar usually provides the tools you need without requiring technical skills.
How to Embed Media on Canvas
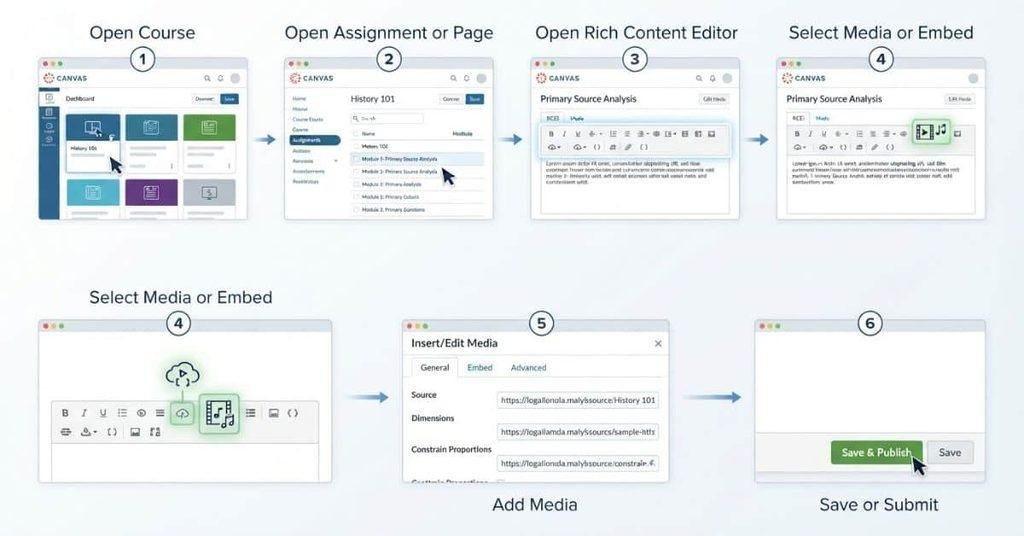
You can usually embed media in Canvas through the Rich Content Editor (RCE). The basic process stays similar across assignments, discussions, and pages, although button names can differ.
Step 1 — Open the Canvas Course
First, log in to your Canvas account through your school’s Canvas website. From your dashboard, select the course where you want to add media.
Make sure you open the correct course before editing any content. Your available tools depend on your course permissions and Canvas setup.
Step 2 — Open the Assignment, Discussion, or Page
Next, open the area where you want to add your media. The exact location depends on what you’re creating or editing.
For example, open an assignment if you need to add media to an assignment response. Open Discussions for a discussion post or Pages for course content.
Step 3 — Open the Rich Content Editor
Look for the Rich Content Editor, where Canvas lets you enter and format content. You may see a text area with formatting buttons, links, media tools, and other editing options.
This editor is the main workspace for adding text and embedded content. The available buttons can vary based on your course and user permissions.
Step 4 — Select the Media or Embed Option
Find the media or embed tool in the editor toolbar. Depending on your Canvas setup, you may see options for recording, uploading, embedding, or adding external media.
Canvas can display different tools based on its version, course settings, and available integrations. If you don’t see an expected option, check the toolbar’s additional tools menu.
Step 5 — Add Your Media
Choose the source that matches your media. You might upload a file, select existing course media, or embed content from an external service.
Follow the prompts to insert the media into your content. After insertion, check that the video, image, or audio appears correctly before continuing.
Step 6 — Save, Submit, or Publish
The final button depends on where you added the media.
- Assignment submission: Save or submit your work according to the assignment instructions.
- Discussion reply: Post or submit your reply after checking the embedded media.
- Page: Save or publish the page after confirming the content.
- Other Canvas areas: Use the available save, submit, or publish option.
Expert Tip: Preview your content before submitting whenever Canvas provides a preview option. This helps catch broken embeds, missing media, or incorrect placement before your instructor sees it.
Students who want to keep a copy of course videos can also read our guide on how to download videos from Canvas Instructure and check the available options.
How to Embed a YouTube Video in Canvas
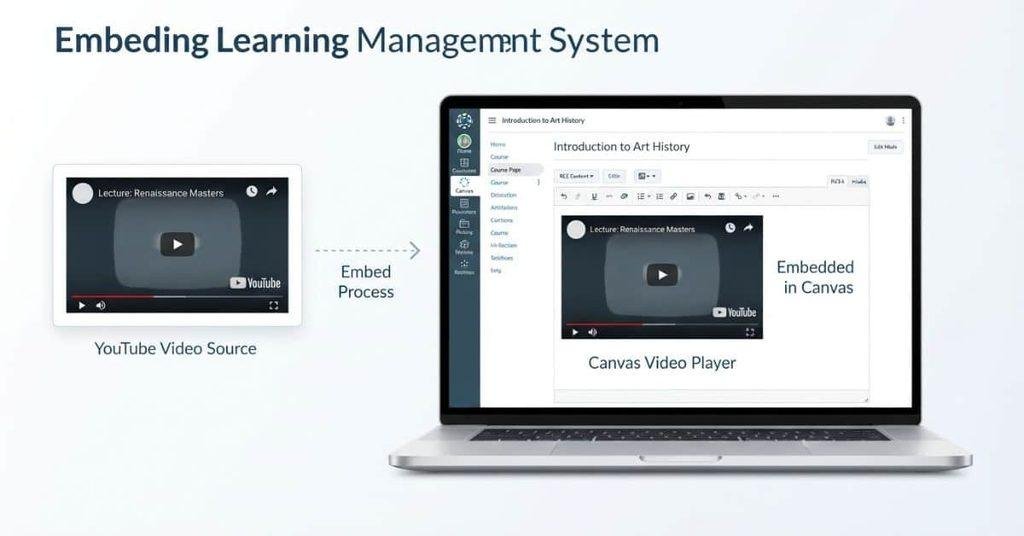
YouTube is one of the easiest ways to add video content to Canvas. Students often use it for assignments, discussion posts, presentations, and project work.
The exact buttons may differ between Canvas versions and course settings. However, the general process remains similar. You can usually add a YouTube video through the Rich Content Editor.
Step 1 — Open the Canvas Content Editor
Open the assignment, discussion, page, or other Canvas area where you want to add the video. Select the option that lets you edit or enter content.
You should see the Rich Content Editor with a text area and formatting toolbar. This is where you’ll insert the YouTube video.
Step 2 — Choose the Embed or Media Option
Look through the editor toolbar for a Media, Embed, or similar option. Some Canvas interfaces place additional tools under a menu or three-dot icon.
The available options can vary based on your institution, course settings, and Canvas configuration. If you don’t see the same button shown in another guide, check the editor’s additional tools.
Step 3 — Add the YouTube Video
Select the appropriate option for adding external media or embedding content. Depending on your Canvas interface, you may be able to enter the YouTube video URL or use an embed option.
After entering the video information, follow Canvas’s prompts to insert it. The video should then appear within the content editor.
Simply pasting a YouTube URL isn’t always the same as embedding the video. A pasted link may appear as clickable text or a link preview instead of an integrated video player.
Step 4 — Preview the Embedded Video
Check the content before submitting or saving it. Look for the video player and confirm that the correct YouTube video appears.
If Canvas provides a preview option, use it to check how the video will appear to other students or your instructor.
Step 5 — Save or Submit
Choose the appropriate final action based on where you added the video. A discussion reply may require posting, while an assignment may require submission.
For a Canvas page, you’ll usually save or publish the changes. Always follow your instructor’s specific submission instructions.
Expert Tip: Test the embedded video before submitting your work. A working link doesn’t always guarantee that the embedded player will display correctly.
How to Embed a Video in a Canvas Assignment
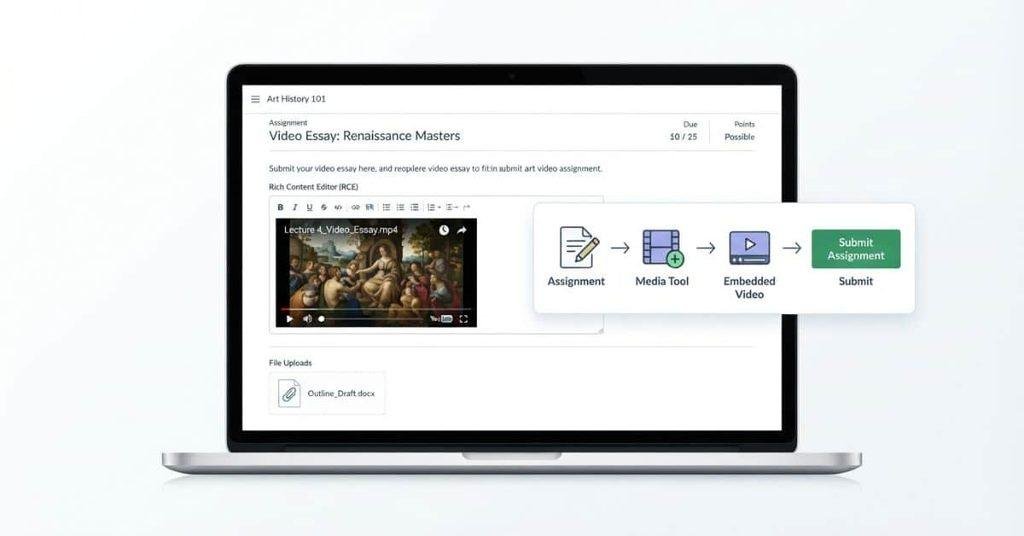
Students may need to add videos to assignments for presentations, projects, reflections, or other coursework. However, Canvas does not provide the same media options for every assignment.
Your available options depend on how your instructor configured the assignment. Some assignments may support media through the Rich Content Editor, while others may only accept specific file types or submission methods.
Embedding a Video in the Assignment Instructions
Students usually don’t control assignment instructions. Your instructor creates and edits those instructions in Canvas.
If you have editing access to the assignment content, you can use the Rich Content Editor to add supported media. Open the assignment editor and look for the media or embed tools.
For most students, however, the instructions are read-only. You won’t be able to insert a video unless your Canvas role gives you editing permission.
Embedding a Video in an Assignment Submission
If you’re submitting a video, first check the assignment’s submission options. Your instructor may allow Text Entry, file uploads, media recordings, or other submission methods.
If Text Entry is available, Canvas may provide the Rich Content Editor for your response. You can then use the available media or embed tools to add your video.
Some assignments may require a video file upload instead. Others may ask you to submit a link. Follow the assignment instructions rather than assuming embedding is available.
What If the Assignment Doesn’t Show an Embed Option?
Don’t assume something is wrong if you can’t find an embed button. Your instructor’s settings control which submission methods appear.
Several factors can affect your options:
- Instructor settings: Your instructor chooses which submission methods the assignment accepts.
- Submission type: The selected submission type determines how you can submit your work.
- Rich Content Editor: Some submission methods may provide the editor, while others may not.
- Course permissions: Your institution may also limit certain Canvas features.
How to Embed a Video in a Canvas Discussion
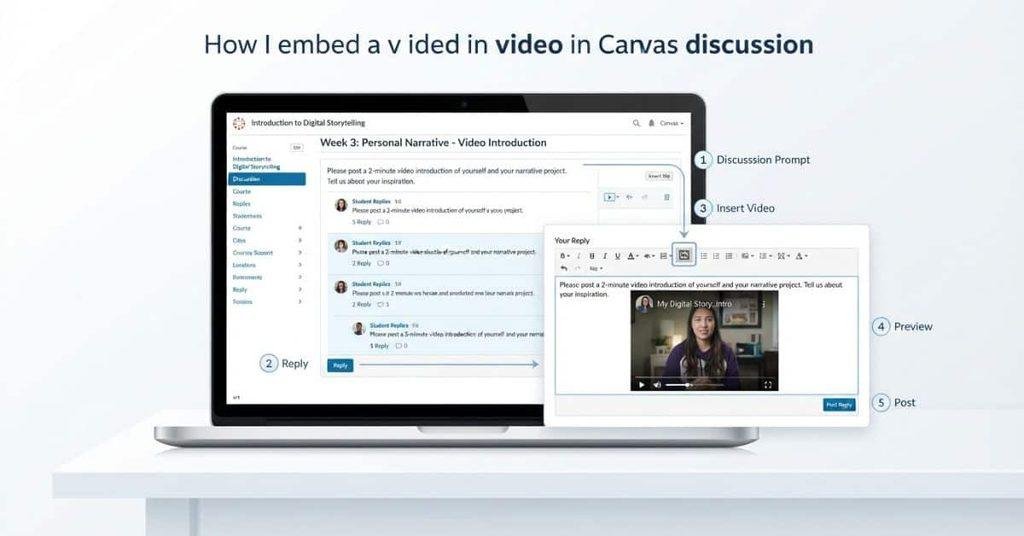
Canvas discussions can let students add videos to their posts or replies. This works well for presentations, explanations, reflections, and class activities.
The exact options depend on how your instructor configured the discussion. Some discussions may provide media tools, while others may limit available response options.
Open the Discussion
Start by opening your Canvas course and selecting Discussions. Find the discussion where you need to add your video.
Read the instructor’s instructions before creating your response. They may specify whether you should upload a video, embed one, or use another submission method.
Start Your Reply
Select the option to create a new reply or response. Canvas will open the area where you can enter your discussion content.
Add any required text before inserting your video. This keeps your response organized and makes the purpose of the media clear.
Open the Rich Content Editor
If your discussion provides the Rich Content Editor, you’ll see a text area with formatting and media tools.
Look through the toolbar for the media, embed, or additional tools menu. Your available buttons may differ from another student’s Canvas interface.
Insert the Video
Choose the available video or media option and follow Canvas’s prompts. You may be able to upload a video, record media, or add supported external content.
If your discussion doesn’t show these options, don’t assume you can add the video another way. Your instructor may have restricted the available submission methods.
Preview and Post
Check your response before posting it. Make sure the correct video appears and that it loads properly.
When everything looks correct, select the option to Post Reply or the equivalent button shown by your Canvas course.
How to Embed Audio in Canvas
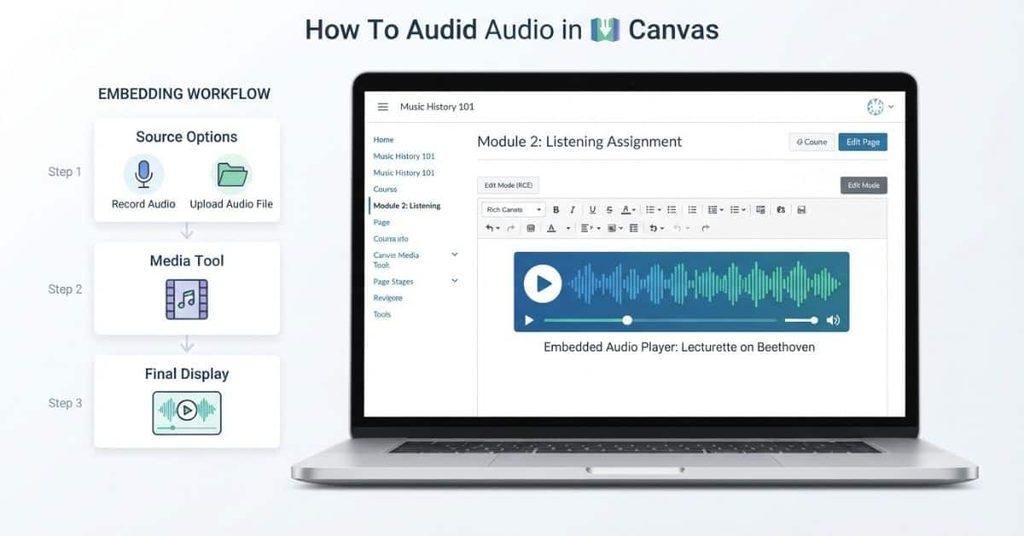
Canvas can also support audio through the Rich Content Editor. Available options depend on your course settings, permissions, and Canvas configuration.
You may be able to record audio directly, upload an audio file, or insert supported media through the editor. The exact options can vary between courses.
To add audio, open the Canvas content area where you need to respond. Open the Rich Content Editor and look for the media or recording tools. Select the available audio option and follow the prompts to record or upload your file.
Before submitting, preview your content when Canvas provides that option. Check that the audio appears correctly and plays as expected.
If you don’t see an audio option, check the assignment or discussion requirements. Your instructor may have limited the available submission methods.
How to Add or Embed Images in Canvas
Images can make Canvas assignments, discussions, and pages easier to understand. You can usually add an image through the Rich Content Editor or an upload option.
The exact image tools may vary based on your course settings and permissions. If you don’t see an image option, check the available tools in your Canvas editor.
Upload an Image
Start by opening the Canvas course and content area where you want to add an image. This could be an assignment, discussion, or page.
Look for an Upload or Image option. Select it, then choose the image file from your computer or device.
Use a common image format such as JPG, PNG, or another format supported by your Canvas setup. Wait for the upload to finish before continuing.
If Canvas gives you image settings, check the file before inserting it. Make sure you’ve selected the correct image for your assignment or post.
Insert the Image Into the Content Editor
If you’re working inside the Rich Content Editor, place your cursor where you want the image to appear.
Select the Image or Insert Image tool from the editor. Choose the uploaded image or select the option to upload a new one.
Canvas should place the image directly into your content. You can often adjust its size or position using the available editing controls.
After inserting the image, read through your content again. Make sure the image appears where you intended and doesn’t cover or disrupt nearby text.
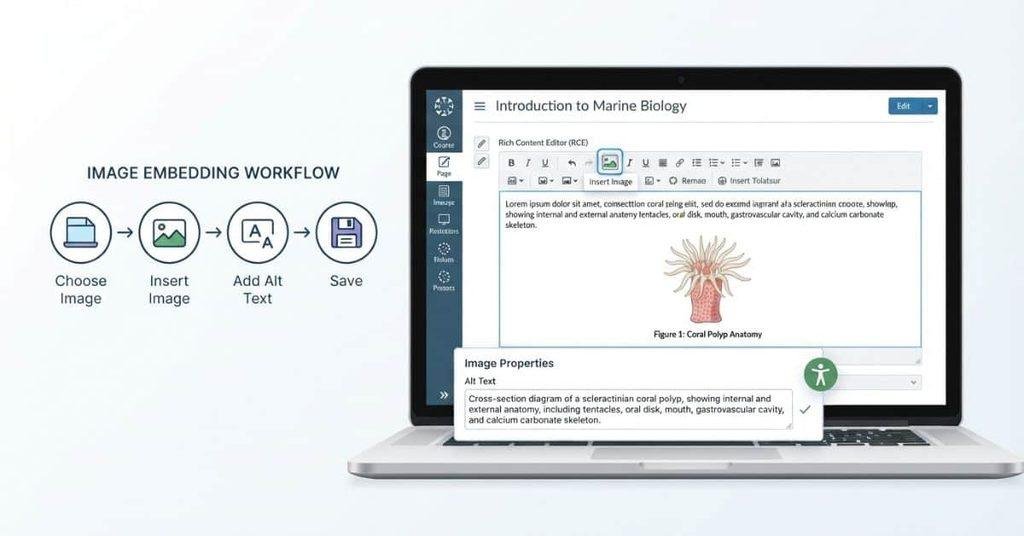
Add Alt Text
Alt text briefly describes an image for people who use screen readers. It also helps explain the image when someone can’t see it.
When Canvas asks for alt text, describe the important information the image communicates. Keep the description clear and specific.
For example, instead of writing “chart,” describe what the chart shows, such as “Bar chart comparing monthly sales from January through June.”
If an image only adds decoration and doesn’t provide useful information, Canvas may offer an option to mark it as decorative.
How to Embed a Video Using an Embed Code
Some websites provide an embed code that lets you place a video directly inside another webpage or content editor.
Canvas may allow embed codes in certain areas through its HTML editor or embed tools. However, not every external website or Canvas course area allows arbitrary HTML or embed code.
Find the Embed Code
First, open the website that hosts your video. Look for an Embed, Share, or similar option.
If the website provides an embed code, copy the complete code. It often looks like a small piece of HTML containing an embedded video or media player.
Only use embed code from a source you trust. Also check your instructor’s instructions before adding external media to an assignment.
Open Canvas’s HTML/Embed Editing Option
Return to Canvas and open the assignment, discussion, page, or other content area where you want the video.
Open the Rich Content Editor if available. Look for an HTML Editor, Embed, or similar option.
The exact button and location can vary. Your institution may also restrict access to HTML editing or external embeds.
Paste the Embed Code
Place your cursor where you want the video to appear. Open the HTML or embed editing area and paste the embed code.
Avoid changing the code unless you understand what each part does. A small mistake can prevent the video from loading correctly.
If Canvas accepts the code, switch back to the normal editor or preview mode. Check whether the video player appears as expected.
Save and Preview
Preview the content before submitting or publishing it. Confirm that the correct video appears and that it loads properly.
If the video doesn’t appear, check whether Canvas supports that external website. The course may also block certain embedded content for security or administrative reasons.
Once your media assignment is complete, you can use the Canvas Grade Calculator to estimate its impact on your overall course grade.
Why Isn’t My Embedded Video Showing on Canvas?
If your embedded video isn’t showing on Canvas, the problem may come from the video’s privacy settings, embed code, browser, or course settings.
Start with the simple checks below before changing anything complicated.
The Video Is Private
A private video may only be visible to specific people. Your Canvas account may not have permission to view it.
Check the video’s privacy settings on the original platform. Make sure your account has permission to access the video.
The Video Requires Login
Some videos require viewers to sign in before they can watch them. Canvas may not always display the video correctly when the required login isn’t available inside the embedded player.
Try opening the original video directly. Sign in if required, then check whether you can watch it.
The Embed Code Is Incorrect
An incorrect or incomplete embed code can prevent the video player from appearing.
If you added the code manually, copy it again from the original video platform. Then replace the old code and preview the Canvas content.
The External Website Does Not Allow Embedding
Some websites prevent their videos from appearing on other websites. This restriction can affect Canvas embeds.
If the video works on its original website but not in Canvas, check whether the source allows external embedding.
The Course or Assignment Restricts Media
Your instructor or school may restrict certain media tools. Some assignments also limit students to specific submission types.
Check the assignment instructions and available submission options. If embedding isn’t available, follow the method your instructor provided.
Browser or Canvas Loading Issue
Sometimes the video doesn’t load because of a temporary browser or Canvas problem.
Refresh the page first. If that doesn’t help, close and reopen Canvas, then try the video again.
The Video Works Outside Canvas but Not Inside Canvas
If the video plays normally on its original website but fails inside Canvas, focus on the embed itself.
Check the privacy settings, embed permissions, and embed code. Then try opening the video directly from its original source.
Simple Troubleshooting Sequence
Follow these steps in order:
- Open the original video and confirm it plays.
- Check privacy settings and make sure you’re allowed to watch it.
- Check whether login is required to access the video.
- Confirm embedding is allowed by the external website.
- Check the embed code if you added it manually.
- Refresh Canvas and try again.
- Try another browser if the problem continues.
- Check the assignment settings for media restrictions.
- Contact your instructor if the assignment doesn’t allow the required media method.
How to Fix a Canvas Embedded Video That Won’t Play
A Canvas embedded video may appear correctly but still refuse to play. Start by checking the original video and its access settings.
Then work through the basic Canvas and browser checks below.
Check the Original Video
Open the video on its original website. Make sure it plays normally outside Canvas.
If it doesn’t play there, the problem likely isn’t Canvas. Fix the original video or access issue first.
Check Sharing/Privacy Settings
Review the video’s sharing and privacy settings. Make sure the intended viewers have permission to watch it.
If the video belongs to someone else, you may need the owner to change its access settings.
Try Opening the Video Directly
Use the video’s original link instead of the embedded player. This can help you determine whether the issue affects the video itself or only the Canvas embed.
If the direct link works but the embedded version doesn’t, check the embed settings and permissions.
Refresh Canvas
Refresh the Canvas page and try the video again. You can also close the page and reopen the course.
Temporary loading issues can sometimes prevent embedded content from appearing or playing correctly.
Try Another Browser
If the video still won’t play, try another supported browser. Also make sure your current browser is updated.
This step can help identify whether the problem comes from your current browser or its settings.
Check Your Internet Connection
A slow or unstable connection can interrupt video playback. Try loading another website to check your connection.
If possible, switch to a more stable connection and reload the Canvas page.
Contact Your Instructor if the Assignment Is Restricting the Media
If you’ve completed the technical checks but still can’t submit the video, review the assignment requirements.
Your instructor may have limited submissions to a specific method, such as file upload, text entry, or a link.
If the required media option isn’t available, contact your instructor. Explain what you’ve tried and ask which submission method they want you to use.
Pro Tip: Take a screenshot of the Canvas error or missing media when asking for help. It can make the problem easier to identify.
Can You Embed Any Video in Canvas?
No. You can’t embed every video in Canvas.
Whether a video works depends on several factors. Canvas may support embedded media, but the external video platform and your course settings also matter.
Here are the main factors that can affect embedding:
- External platform: The video website must support embedding.
- Privacy and sharing settings: You need permission to view the video.
- Embed permissions: The video owner may disable external embedding.
- Canvas course settings: Your course may limit available media tools.
- Instructor configuration: An instructor can restrict assignment or discussion submission methods.
- Institution restrictions: Your college or university may block certain external content or tools.
For example, a YouTube video may allow embedding, while another video hosted on a private website may not.
Your Canvas account also doesn’t automatically give you access to every external video. You may need to sign in or receive permission from the video owner.
If an embedded video doesn’t work, open the original video directly first. If it plays there but not inside Canvas, check its sharing and embedding settings.
Embed vs. Upload a Video to Canvas
When adding a video to Canvas, you may have two choices: embed the video or upload the video file.
The best option depends on your assignment instructions, the video source, and the tools available in your Canvas course.
| Feature | Embed | Upload |
|---|---|---|
| Video hosted elsewhere | Usually | No |
| Appears inside Canvas | Yes | Yes |
| File stored in Canvas | Usually no | Yes |
| Depends on external sharing | Yes | No |
| File size concerns | Less relevant | More relevant |
| External platform access | May be required | Usually no |
When Should You Embed a Video?
Embedding works well when the video already exists on an external platform that allows embedding.
For example, you might embed a YouTube video into a Canvas discussion or page. The video stays hosted on the external platform while the player appears inside Canvas.
Choose embedding when:
- The external platform allows embedding.
- Your instructor permits embedded media.
- Viewers can access the video.
- You want the video to appear directly within Canvas.
Remember that external access can change later. A private video or deleted video can stop working inside Canvas.
When Should You Upload a Video?
Uploading makes more sense when your instructor asks you to submit a video file directly.
The video becomes a file associated with the Canvas submission or content area. You don’t need the viewer to access an external video platform in the same way.
Choose uploading when:
- Your instructor specifically requests a video file.
- The assignment provides a file-upload option.
- The video isn’t hosted on an embeddable platform.
- You want to avoid depending on external sharing settings.
However, uploaded videos can have file-size or upload-time limitations. Always check your course instructions before uploading a large video.
How to Embed Media on Canvas Mobile
You can add some types of media through the Canvas Student app on your phone or tablet. However, mobile options can differ from the Canvas browser version.
Your course settings, assignment type, and app version can affect which media tools you see. If an option isn’t available in the app, try opening Canvas in a web browser.
Open the Course
Open the Canvas Student app and sign in to your account.
From the dashboard, select the course where you need to add media. Make sure you’ve opened the correct course before continuing.
Open the Assignment or Discussion
Open Assignments or Discussions, depending on where you need to submit your media.
Read the instructor’s instructions first. They may require a specific format, such as a video upload, media recording, or link.
Look for Available Media Tools
Open the available response or submission area. Look for media, attachment, recording, or other tools provided by the app.
You may not see the same Rich Content Editor options that appear when using Canvas in a desktop browser.
Add or Record Media
If the assignment provides a media option, follow the prompts to upload or record your content.
Your phone may ask for permission to access your camera, microphone, or photos. Allow access if it’s required for the submission.
If the app doesn’t provide the media option you need, don’t assume something is wrong. The instructor or institution may have limited the available submission methods.
Preview Before Submitting
Review your media before submitting it. Check that the correct file or recording appears and that the audio or video works.
If the mobile app doesn’t provide the required option, try Canvas through a browser on a computer. The browser version may provide additional editing and embedding tools.
Conclusion
Learning how to embed media on Canvas makes assignments, discussions, and course pages easier to enhance. We covered videos, YouTube, images, audio, embed codes, mobile options, and common troubleshooting steps.
Canvas gives you several ways to add media, but available options can vary by course and instructor. Always check assignment requirements before uploading or embedding content. When a video won’t play, check its privacy settings, sharing permissions, and original link first.
With these steps, beginners can confidently add media without unnecessary technical work. Choose the method that best matches your instructor’s requirements and Canvas settings.
Have you used Canvas to embed a video or image? Share your experience in the comments, or explore more helpful Canvas guides on our website.
Frequently Asked Questions
Open the Canvas content area and use the Rich Content Editor. Look for the media, image, video, or embed option. Choose your media source and follow the prompts. Available tools can vary by course settings.
Open the assignment, discussion, or page where you want the video. Open the Rich Content Editor and select the available media or embed tool. Add your video, preview it, then save or submit your content.
Open the Canvas editor and choose the available media or embed option. Depending on your Canvas setup, you may enter the YouTube URL or use an embed code. Preview the video before submitting.
Yes, if the assignment allows embedded media or provides a suitable Rich Content Editor. Some instructors restrict submission types, so check the assignment instructions first.
Open the discussion and start your reply. If the Rich Content Editor provides media tools, use the available video or embed option. Preview the video before posting your response.
Yes, Canvas can support audio through available media tools. Depending on your course settings, you may be able to upload or record audio. The exact options can vary.
Check the video’s privacy and sharing settings first. Then open the original video directly, check embedding permissions, refresh Canvas, and try another browser. Course restrictions can also prevent playback.
Sometimes. Canvas may allow embed codes in certain content areas through its HTML or embed tools. However, external websites, instructors, or institutions may restrict embedded content.
Embedding keeps the video hosted on an external platform while displaying it inside Canvas. Uploading places the video file in Canvas. Embedding may depend on external access, while uploading can involve file-size limits.
The Canvas Student app supports some media options, but mobile tools can differ from the browser version. If you don’t see the option you need, try Canvas in a desktop browser.

We are the Canvas Academic Team, a developer team focused on building simple and practical tools that help students succeed academically. This platform was created specifically for Canvas LMS students to make grade tracking, GPA calculations, exam planning, and academic management easier and more efficient.
Our focus is on creating fast, accurate, and student-friendly educational tools along with helpful learning resources that improve productivity and reduce academic stress.
Through CanvasGradeCalculator.com, our goal is to continue building useful resources that help students study smarter, stay organized, and achieve better academic results.