
Table of Contents
Introduction
Have you ever pasted your references into Canvas and wondered why the hanging indent disappeared?
Learning how to add a hanging indent in Canvas assignment text box can feel confusing for beginners. Canvas does not always provide a direct hanging-indent button in its Rich Content Editor. Your options may also depend on your course and assignment settings.
A hanging indent is common in APA references and MLA Works Cited pages. The first line stays at the left margin, while the following lines move inward. This simple format helps your citations look organized and follow academic style guidelines.
In this guide, you’ll learn the easiest ways to create a hanging indent for a Canvas assignment. We’ll cover Canvas formatting options, Microsoft Word, and Google Docs workarounds. You’ll also learn what to do if Canvas removes your formatting after you paste it.
By the end, you’ll know how to format your references correctly and submit them with confidence.
What Is a Hanging Indent?
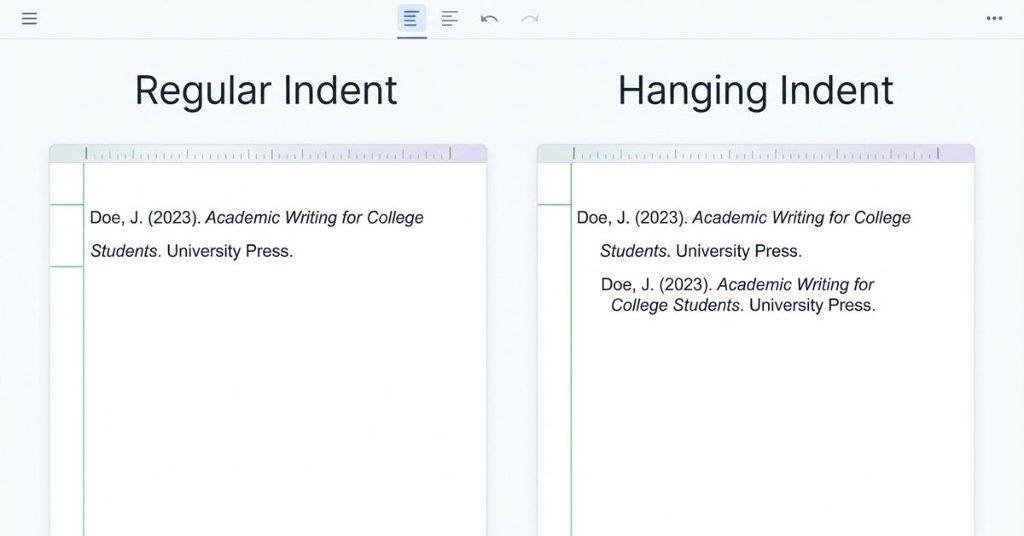
A hanging indent is a paragraph format where the first line stays at the left margin, while every line after it moves inward. This layout makes longer reference entries easier to scan and organize.
Think of it as the opposite of a regular first-line indent. With a hanging indent, the first line stands out, while the remaining lines are indented. Students often use this format when creating citation and reference pages for college assignments.
If you are preparing a written Canvas assignment, you may also want to learn how to undo your last action in a Canvas discussion post when you make an editing mistake.
What Does a Hanging Indent Look Like?
A hanging indent makes the first line of an entry begin at the normal left margin. Any additional lines start farther to the right. This pattern repeats for every entry in a reference list.
For example:
Smith, J. A. (2025). Understanding academic writing and research
    methods. College Writing Journal, 12(3), 45–52.
The first line begins at the left margin. The second line moves inward, creating the “hanging” appearance. This format becomes especially useful when an entry wraps onto multiple lines.
Visual idea: Show a reference entry with the first line aligned left and the following lines indented.
Caption: A hanging indent keeps the first line at the margin while later lines move inward.
SEO alt text: Example of a hanging indent in an academic reference entry
When Do Students Use Hanging Indents?
Students commonly use hanging indents when formatting academic sources. The exact requirements depend on the citation style and assignment instructions.
Common uses include:
- APA reference lists: Source entries typically use a hanging indent.
- MLA Works Cited: Entries commonly use a hanging indent for multi-line citations.
- Bibliographies: Many academic styles use hanging indents to organize sources.
- Reference entries: Longer citation entries often use this format for easier scanning.
Expert tip: Format your entire reference list consistently. Mixing regular and hanging indents can make your submission look unfinished.
Hanging Indent vs. Regular Indent
The main difference is which line gets indented.
| Format | First Line | Following Lines |
|---|---|---|
| Hanging indent | Stays at the left margin | Move inward |
| Regular indent | Moves inward | Stay aligned with the first line |
A regular indent is common when starting a new paragraph. A hanging indent works better for lists of sources and citations.
For Canvas assignments, knowing this difference helps you choose the correct formatting method. It also makes it easier to check whether your references look correct before submitting.
Can You Add a Hanging Indent Directly in Canvas?
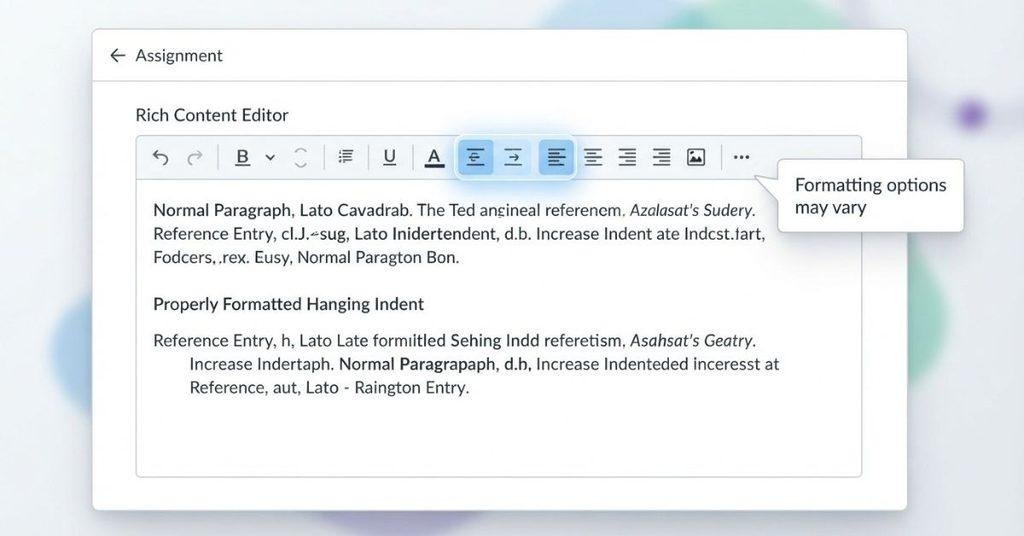
The short answer is: Canvas may not provide a dedicated hanging-indent button in the Rich Content Editor. The editor includes common formatting tools, but the exact options can vary between Canvas environments and course setups.
Depending on your Canvas version, you may see tools for text alignment, lists, indentation, and paragraph formatting. However, a specific hanging indent control may not appear in the toolbar. This can make formatting APA references or MLA Works Cited entries confusing for students.
Canvas assignments can also use different submission methods. Some instructors allow responses directly inside the Rich Content Editor. Others require students to upload Word documents, PDFs, or other files. Your available formatting options depend on the method your instructor selected.
If the text editor doesn’t give you the hanging indent you need, don’t worry. You can create the formatting in Microsoft Word or Google Docs first. You can then paste the formatted text into Canvas and check whether the formatting stays intact.
Another option is to use the indentation controls available in the Canvas editor. These controls may help move lines or paragraphs inward, but they don’t always create a true hanging indent.
After formatting your references, understanding how peer review works in Canvas can help you prepare for assignments that include student feedback.
Pro tip: Always check your final Canvas response before submitting. Formatting can change when you paste content into the Rich Content Editor.
How to Add a Hanging Indent in a Canvas Assignment Text Box
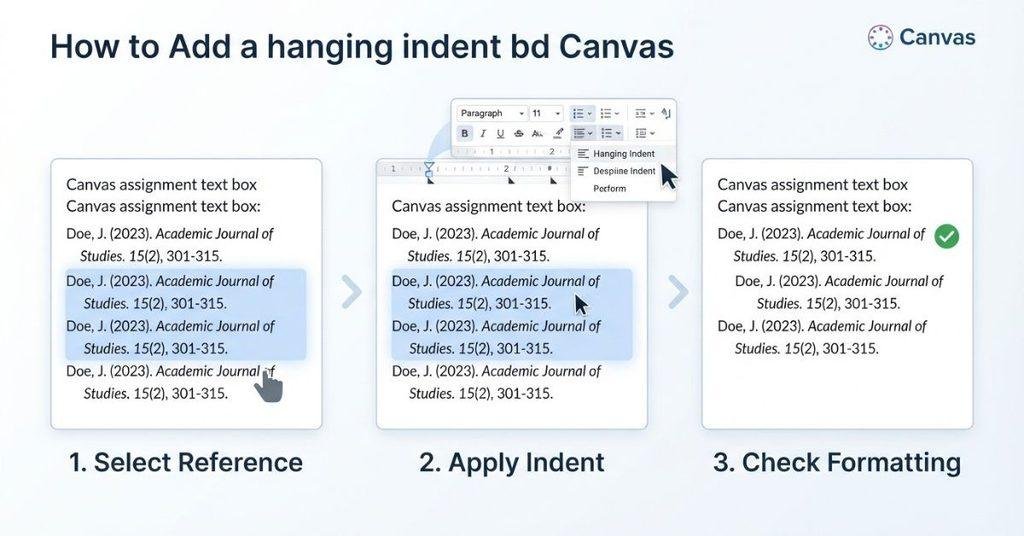
Adding a hanging indent in a Canvas assignment can take a few extra steps. The process depends on the formatting controls available in your Rich Content Editor.
Start by preparing your reference correctly. Then select the text and use the available indentation options. Finally, check the result before submitting your assignment.
Step 1 — Open Your Canvas Assignment
First, log in to your Canvas account using your school’s Canvas website. Enter your username and password, then open your Canvas dashboard.
Find the course containing the assignment you need to complete. Select the course and open the relevant assignment from the course navigation or assignments page.
Read the assignment instructions before editing your response. Your instructor may specify APA, MLA, or another formatting style. They may also require a particular submission method.
If the assignment accepts text directly in Canvas, look for the option to start or submit your assignment. This should open the area where you can enter your response.
Take a moment to confirm you’re working on the correct assignment. This prevents you from formatting content in the wrong submission area.
Step 2 — Start or Edit Your Assignment Response
Open the assignment response area by selecting the available option to begin or edit your submission. Canvas should display the Rich Content Editor if direct text entry is enabled.
Click inside the text box where you want to enter your response. You should see a formatting toolbar with the options supported by your Canvas environment.
The toolbar may include controls for text style, alignment, lists, links, and indentation. Your screen may look different from another student’s Canvas account.
If you don’t see an indentation option, don’t assume you’re doing something wrong. Canvas configurations can vary between institutions and assignments.
Before continuing, make sure the editor is active. You should see your cursor inside the response area when you click the text box.
Step 3 — Add Your Reference or Citation
Enter your reference, citation, or Works Cited entry inside the Canvas text box. You can type the content manually or paste it from another document.
Check the source information before formatting it. Make sure the author’s name, publication date, title, and other citation details are correct.
Formatting won’t fix an incorrect citation. Correct the content first, then work on the indentation.
If you’re adding several references, enter the complete list before adjusting the formatting. This makes it easier to apply consistent formatting across multiple entries.
Avoid copying citation text from random websites without checking it. Citation generators can also contain errors, so verify important details against your source.
Step 4 — Select the Text
Highlight the reference entry or paragraph you want to format. You can select one entry or several entries, depending on what you’re submitting.
Make sure you select the complete reference. This includes the first line and every additional line that wraps below it.
Selecting only the second line can produce inconsistent formatting. Your goal is to apply the indentation to the entire reference entry.
For a full reference list, you may be able to select all relevant entries at once. Check that unrelated paragraphs aren’t included in your selection.
Once the text is highlighted, look at the Canvas formatting toolbar. Find any available indentation or paragraph controls.
Step 5 — Apply the Available Indentation Controls
Use the indentation controls available in your Canvas Rich Content Editor. These controls may allow you to move selected text farther from the left margin.
Look for buttons related to increase indent, decrease indent, or paragraph formatting. The exact icons and labels can differ between Canvas environments.
A regular increase-indent button may not create a true hanging indent by itself. It can move an entire paragraph instead of only the lines after the first line.
If Canvas doesn’t provide the exact control you need, use Microsoft Word or Google Docs instead. These programs offer more precise paragraph indentation settings.
Create the hanging indent there, then paste the formatted entry into Canvas. Always check the pasted result because Canvas may remove some formatting.
Step 6 — Check the Second and Following Lines
Now inspect the reference carefully. The first line should remain at the left margin, while the second and following lines should move inward.
For example, a correctly formatted entry may look like this:
Johnson, R. T. (2026). Writing effective college research papers
    for beginners. Academic Writing Review, 8(2), 15–24.
The first line begins at the normal margin. The following line starts farther to the right.
If every line moved inward, you created a regular paragraph indent instead. If none of the lines moved, Canvas may not have preserved your formatting.
Check each reference if you’re working with a longer list. Consistent formatting matters on APA reference pages and MLA Works Cited pages.
Expert tip: Zoom in slightly if the indentation is difficult to see. Small spacing differences can be easier to identify with a closer view.
Step 7 — Preview Before Submitting
Before submitting your Canvas assignment, review the entire response. Don’t assume the formatting will remain unchanged after you paste or edit your content.
Look at every reference entry and check the first line. It should remain at the left margin, while later lines should be indented.
Also check spacing, punctuation, line breaks, and citation details. These small details can affect the overall appearance of your reference list.
If the hanging indent disappears, try creating the formatting in Word or Google Docs. Then paste the content into Canvas again and review it.
If Canvas still doesn’t preserve the formatting, check your instructor’s submission requirements. Uploading a properly formatted document may be an option if your instructor allows it.
Pro tip: Preview your submission immediately before clicking the final submit button. This gives you one last chance to catch formatting problems.
How to Create a Hanging Indent in Canvas Using HTML
Using HTML can be a useful workaround when Canvas doesn’t offer a direct hanging-indent control. However, this method only works when your Canvas assignment provides access to the HTML or source-code editor.
The basic idea is simple. You give the reference a left offset, then use a negative first-line indent. This keeps the first line at the margin while moving the remaining lines inward.
Open the HTML Editor
Open your Canvas assignment and enter the Rich Content Editor. Depending on your Canvas interface and assignment setup, you may see an option for viewing or editing the underlying HTML.
Look for an HTML Editor, HTML view, or similar source-code option. The location and availability of this option can vary between Canvas environments.
If you don’t see an HTML option, don’t force this method. Use Word, Google Docs, or the available Canvas formatting tools instead.
Add a Hanging-Indent CSS Style
A hanging indent uses two simple CSS ideas. First, text-indent moves the first line backward. Then, padding-left moves the whole paragraph forward.
Here’s a simple example:
<p style="padding-left: 0.5in; text-indent: -0.5in;">
Smith, J. A. (2026). Understanding academic writing and research methods.
College Writing Journal, 12(3), 45–52.
</p>
The padding-left value moves the paragraph inward. The negative text-indent brings the first line back to the left margin.
This creates the basic hanging-indent effect without complicated CSS. You can replace the sample citation with your own reference entry.
Expert tip: Use this approach only when your Canvas editor accepts the HTML and preserves inline styles. Canvas may sanitize or change some HTML depending on the context.
Preview the Formatting
After adding the HTML, return to the visual editor if your Canvas interface provides that option. Look closely at the reference entry.
The first line should sit at the left margin. The second and following lines should appear slightly farther inward.
If the entire paragraph moves inward, the CSS may not have applied correctly. If the formatting disappears, Canvas may have removed the style.
For multiple references, check several entries instead of checking only one. Consistent indentation should appear throughout the reference list.
Submit Only After Checking the Final Layout
Don’t submit immediately after adding HTML. First, review the final appearance in the Canvas editor.
Check the first line, following lines, spacing, and citation details. Also confirm that Canvas hasn’t removed your HTML formatting.
HTML availability and behavior can vary by Canvas context, institution, and assignment settings. Your instructor may also require a specific submission format.
If the HTML method doesn’t work, create the hanging indent in Microsoft Word or Google Docs. Then follow the submission instructions provided by your instructor.
How to Make a Hanging Indent Before Pasting Into Canvas
For many students, creating the hanging indent before pasting into Canvas is the easiest approach. Microsoft Word and Google Docs provide more precise paragraph controls than the Canvas text editor.
Create and format your reference in one of these programs first. Then copy it into your Canvas assignment and check the final appearance.
Create the Hanging Indent in Microsoft Word
Start by typing or pasting your reference into Microsoft Word. Select the complete reference entry or reference list you want to format.
Open the paragraph settings and find the indentation options. Choose Hanging for the special indentation setting. Set the required measurement based on your citation style.
Once the reference looks correct, copy it and paste it into your Canvas assignment text box. Check the result carefully because Canvas may not preserve every formatting property.
If the indent remains visible, you’re ready to continue. If it disappears, you may need to recreate the formatting in Canvas or use another submission method.
Create the Hanging Indent in Google Docs
Google Docs also lets you create a hanging indent before moving your work into Canvas. Enter your reference and select the text you want to format.
Use the indentation controls or ruler to create a hanging indent. Make sure the first line stays at the left margin while later lines move inward.
After formatting the reference, copy it and paste it into the Canvas Rich Content Editor. Check the reference immediately after pasting.
If the indentation looks correct, review the rest of your assignment. If Canvas removes the indent, try another formatting method instead.
Pro tip: Keep your original formatted reference in Word or Google Docs. You can use it again if Canvas removes the formatting.
What If Canvas Removes the Formatting?
Canvas may not preserve formatting copied from another program. If your hanging indent disappears, first check the formatting tools available inside the assignment editor.
You may need to recreate the indentation manually within Canvas. Another option is submitting a Word document or PDF if your instructor allows that format.
Don’t choose an alternative submission method without checking the assignment instructions. Your instructor may require responses directly inside the Canvas text box.
How to Add a Hanging Indent for APA References in Canvas
APA reference lists commonly use hanging indents to organize source entries. However, Canvas doesn’t automatically apply APA formatting to your references.
You need to format the references yourself before submitting them. You can use Word, Google Docs, or supported Canvas formatting tools.
Format the APA Reference
First, make sure each APA reference contains the correct information. Check the author, date, title, publication information, and other required details.
Then select the complete reference entry. If you have several sources, apply the same formatting consistently across the entire reference list.
Prepare the reference according to the APA requirements specified by your instructor. Don’t rely on Canvas to correct citation structure or formatting.
Set the First Line Against the Margin
A hanging indent keeps the first line of each reference against the left margin. The remaining lines should begin farther to the right.
After applying the indentation, look at the first line carefully. It should not move inward with the rest of the paragraph.
This makes each source easier to identify when someone scans the reference list.
Indent the Remaining Lines
The second and following lines should move inward from the left margin. This creates the hanging-indent appearance used in an APA reference list.
Check entries that wrap onto several lines. Every continuation line should follow the same indentation pattern.
If you’re using Word or Google Docs, the hanging-indent setting can apply this consistently. When working directly in Canvas, available formatting controls may differ.
Check Double Spacing and Other Requirements
After setting the hanging indent, review the rest of your APA formatting. Check line spacing, font, margins, capitalization, and other requirements from your assignment.
Canvas won’t automatically turn a basic reference list into a properly formatted APA page. You remain responsible for checking the final presentation.
Before submitting, review the references in the Canvas text box. Make sure the hanging indents and spacing still appear correctly.
Expert tip: Compare your final Canvas reference list with the original formatted version. This quickly reveals formatting changes that happened during copying and pasting.
How to Add a Hanging Indent for MLA Works Cited in Canvas
MLA Works Cited entries commonly use a hanging indent. The first line stays against the left margin, while later lines move inward.
Canvas doesn’t automatically apply MLA formatting. You need to format each citation and then verify how it appears in the assignment editor.
Enter Your Citation
Open your Canvas assignment and enter the complete Works Cited entry. You can type it directly or paste it from Word or Google Docs.
Check the citation details before adjusting the indentation. Make sure the author’s name, title, publication information, and other details follow your instructor’s MLA requirements.
Apply the Hanging Indent
Select the complete Works Cited entry. Use the indentation controls available in the Canvas Rich Content Editor.
A correct hanging indent keeps the first line at the left margin. The second and following lines should move inward.
If Canvas doesn’t provide the required control, create the hanging indent in Word or Google Docs first. Then paste the formatted citation into Canvas.
Check Spacing and Alignment
Review the entire Works Cited entry after applying the indent. Check that the first line remains aligned with the left margin.
Make sure continuation lines have the same indentation. Also check spacing and alignment according to your instructor’s MLA requirements.
Don’t assume Canvas will automatically correct these settings. Review the actual text displayed in the assignment editor.
Preview Before Submission
Preview your assignment before submitting it. Check every Works Cited entry for consistent indentation and spacing.
If the formatting changes during the preview, recreate it using another method. You can also ask your instructor whether a formatted document upload is allowed.
What If Canvas Removes My Hanging Indent?
Canvas can sometimes change formatting when you paste content into the Rich Content Editor. The solution depends on how the reference was copied and how the assignment accepts submissions.
Pasting From Word or Google Docs
Word and Google Docs may contain formatting that doesn’t transfer perfectly into Canvas. Your hanging indent may disappear or change after pasting.
Fix: Paste the reference into Canvas, then inspect it immediately. If the indent disappears, try recreating it using Canvas’s available controls.
Canvas Formatting Was Stripped
Some formatting may be removed when Canvas processes pasted content. This can happen even when the reference looked correct before pasting.
Fix: Reapply the indentation inside Canvas if possible. If the editor doesn’t support the required formatting, use an allowed document submission instead.
The Text Was Pasted as Plain Text
Plain-text pasting removes formatting from the original document. This can eliminate your hanging indent completely.
Fix: Paste normally when appropriate, then check whether the formatting remains. If not, apply the indentation again inside Canvas or use a properly formatted document.
The Assignment Uses a Different Submission Method
Your instructor may require a file upload instead of direct text entry. In that case, the Canvas text box may not be the right place for your formatted references.
Fix: Follow the assignment’s submission instructions. If Word or PDF uploads are allowed, submit your properly formatted document instead.
The Formatting Looks Correct in Edit Mode but Wrong After Submission
Sometimes the editing view doesn’t match the final submitted appearance. This can make a correctly formatted reference appear different after submission.
Fix: Use Canvas’s available preview or submission-review features before finalizing your work. If the submitted version changes, contact your instructor and explain the formatting issue.
How to Fix a Hanging Indent That Isn’t Working in Canvas
A hanging indent that refuses to work usually needs a simple formatting reset. Try these fixes in order before switching to another method.
Re-select the Text
Select the entire reference entry again. Make sure you include the first line and every continuation line.
Then apply the indentation controls to the complete selection. Partial selections can create inconsistent formatting.
Remove Conflicting Formatting
Existing formatting can interfere with your new indentation. Select the affected text and remove unwanted formatting if your editor provides a clear-format option.
Then try applying the hanging indent again. Check the result before moving to another method.
Reapply the Indentation
After clearing conflicting formatting, select the reference again. Use the available increase or paragraph indentation controls.
Check whether only the continuation lines move inward. If the entire paragraph moves, you’re creating a regular indent instead.
Try the HTML/Source View if Available
Some Canvas environments provide an HTML or source-code view. If you have access to it, you can try a simple hanging-indent style.
However, HTML availability and behavior can vary by institution and assignment. Canvas may also modify certain formatting after you leave the source view.
Try Formatting the Text in Word or Google Docs
If Canvas continues to cause problems, create the reference in Word or Google Docs. Apply the hanging indent there before copying it into Canvas.
After pasting, check whether Canvas preserved the formatting. Keep the original document available in case you need to make another attempt.
Check the Final Submission Preview
Always inspect the final layout before submitting. Check the first line, continuation lines, spacing, and alignment.
If the formatting still doesn’t work, follow your instructor’s submission requirements. A properly formatted Word or PDF file may provide a more reliable option when allowed.
Pro tip: Don’t judge the formatting from the editor alone. The final preview is the best place to confirm how your reference will appear.
Can You Add a Hanging Indent in the Canvas Student App?
The Canvas Student app can handle many assignment tasks, but mobile formatting options may be more limited. You shouldn’t assume every desktop Rich Content Editor feature appears in the app.
Open the Assignment
Open the Canvas Student app and sign in to your account. Select the course containing your assignment.
Open the assignment and review its instructions. Look for the option that lets you start or edit your text response.
Edit the Text Response
Tap inside the assignment response area. Enter your reference or citation as required.
If you’ve already written your response, select the option to edit it. Make sure your citation is complete before changing its formatting.
Check Available Formatting Tools
Look through the formatting tools available in the app. Your available options can depend on the Canvas environment and assignment setup.
You may not find a dedicated hanging-indent control. Don’t assume the mobile editor supports every formatting feature available on a computer.
Use a Computer if Advanced Formatting Isn’t Available
If the app doesn’t provide the formatting control you need, switch to a computer. The desktop Canvas interface may provide more suitable editing options.
You can also create your reference in Word or Google Docs. Then follow your instructor’s instructions for submitting the formatted content.
Hanging Indent Example for a Canvas Assignment
A hanging indent is easier to understand when you compare two versions of the same reference. Look at where the first line and following lines begin.
Without a Hanging Indent
Without a hanging indent, the reference may appear as a standard block of text:
Smith, J. A. (2026). Understanding academic writing and research
methods. College Writing Journal, 12(3), 45–52.
Both lines begin at the same position. The second line doesn’t move inward from the left margin.
This may not meet the formatting requirements for your citation style.
With a Hanging Indent
A correctly formatted hanging indent looks like this:
Smith, J. A. (2026). Understanding academic writing and research
    methods. College Writing Journal, 12(3), 45–52.
The first line starts at the left margin. The second and third lines move inward when the reference wraps.
When checking your Canvas assignment, focus on the left edge of each line. The first line should sit at the margin, while continuation lines should start farther to the right.
Hanging Indent vs. First-Line Indent
A hanging indent and a first-line indent work in opposite ways. Understanding the difference helps you avoid common formatting mistakes.
| Formatting | First Line | Following Lines |
|---|---|---|
| Hanging indent | At margin | Indented |
| First-line indent | Indented | At margin |
| No indent | At margin | At margin |
With a hanging indent, the first line stays at the margin. Every line after it moves inward.
With a first-line indent, the first line moves inward. The remaining lines stay at the normal margin. This style commonly appears at the beginning of paragraphs.
With no indent, every line starts at the same left margin. This doesn’t create either type of indentation.
For Canvas assignments, reference lists usually require you to follow the citation style specified by your instructor. Don’t substitute a first-line indent for a required hanging indent.
Expert tip: Look only at the first and second lines. If the first line sticks out to the left, you likely have a hanging indent.
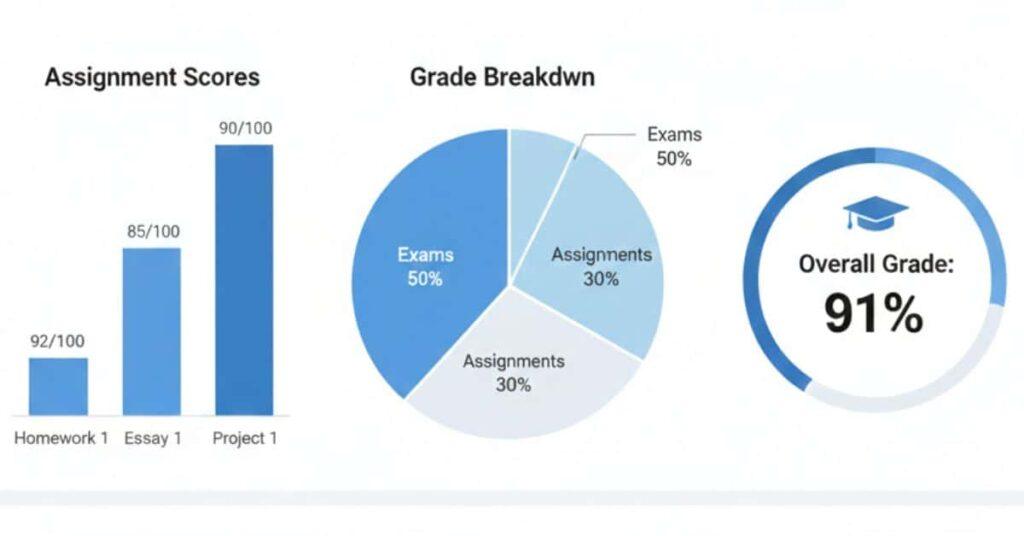
Before submitting an assignment, you can use the Canvas Grade Calculator to estimate how the assignment score could affect your overall grade.
Conclusion
Learning how to add a hanging indent in Canvas assignment text box is easier once you know your options. We covered Canvas formatting tools, HTML, Word, Google Docs, and common troubleshooting steps.
A hanging indent keeps your references organized and helps meet APA or MLA formatting requirements. Canvas may handle formatting differently depending on your editor and assignment settings. Always check your final submission before clicking Submit.
If Canvas does not preserve your formatting, create the hanging indent in Word or Google Docs first. Then paste it into Canvas and review the result.
Found this guide helpful? Share it with a classmate who needs help formatting references. You can also explore more student-friendly guides on our website.
Frequently Asked Questions
Select the complete reference or citation in the Canvas text box. Then use any available indentation controls in the Rich Content Editor. If Canvas does not create a true hanging indent, format the reference in Word or Google Docs first. Paste it into Canvas and check whether the formatting stays intact.
Canvas may not have a dedicated hanging-indent button in the Rich Content Editor. Available formatting tools can vary by Canvas setup and assignment. If you cannot find a hanging-indent option, create the formatting in Word or Google Docs. You can also use HTML if your Canvas editor provides an HTML or source-code view.
Enter or paste your reference into the assignment text box. Select the entire reference, then try the available indentation controls. A correct hanging indent keeps the first line at the left margin. The second and following lines should move inward.
Select the full reference entry before applying indentation. Use Canvas’s available indent controls if they create the format you need. For APA or MLA references, a hanging indent usually works better than indenting the entire paragraph. Always check the final formatting before submitting.
First, create your APA references with the correct author, date, title, and publication information. Then apply a hanging indent to each reference entry. Check other APA requirements, such as spacing and capitalization. If Canvas changes the formatting, create the references in Word or Google Docs and use an allowed submission format.
Enter your complete MLA citation in the assignment text box. Select the entire Works Cited entry and apply a hanging indent if Canvas provides the needed controls. If it does not, format the citation in Word or Google Docs first. Then paste it into Canvas and verify the result.
Canvas may remove or change formatting when you paste text from another program. The available editor tools can also vary between Canvas environments. Try selecting the entire reference and reapplying the indentation. If that fails, format it in Word or Google Docs and check the Canvas preview before submitting.
Yes, you can try pasting a hanging indent from Microsoft Word into Canvas. However, Canvas may not preserve all formatting from Word. After pasting, check whether the first line stays at the margin and later lines remain indented. If the formatting disappears, recreate it in Canvas or use an allowed document upload.
You may be able to use HTML when your Canvas assignment provides an HTML or source-code editor. A common method uses padding-left with a negative text-indent. Canvas can sanitize or modify HTML, so always preview the result. If the style does not work, use Word or Google Docs instead.
The Canvas Student app may offer fewer formatting options than the desktop version. The available tools can depend on the app and assignment setup. If you cannot create the hanging indent on your phone, use Canvas on a computer. You can also format the references in Word or Google Docs first.

We are the Canvas Academic Team, a developer team focused on building simple and practical tools that help students succeed academically. This platform was created specifically for Canvas LMS students to make grade tracking, GPA calculations, exam planning, and academic management easier and more efficient.
Our focus is on creating fast, accurate, and student-friendly educational tools along with helpful learning resources that improve productivity and reduce academic stress.
Through CanvasGradeCalculator.com, our goal is to continue building useful resources that help students study smarter, stay organized, and achieve better academic results.