
Table of Contents
Introduction
Have you ever opened Blackboard and wondered where you are supposed to start your discussion post?
Learning how to create a thread in discussion board on Blackboard can feel confusing when you are using Blackboard for the first time. The process is usually simple, but the buttons and menus can look different across courses.
Blackboard discussions are common in U.S. colleges and universities. Instructors often use them for class conversations, weekly assignments, and peer responses.
For beginners, the biggest challenge is finding the correct discussion and knowing which option creates a new thread. Blackboard Ultra and Blackboard Original can also use different layouts.
This guide walks you through the process step by step. You will learn how to open your course, find the right discussion, create a thread, and submit your post.
We will also cover attachments and common differences between Blackboard versions. By the end, you should know exactly where to create and post your discussion thread.
How to Create a Discussion Thread on Blackboard
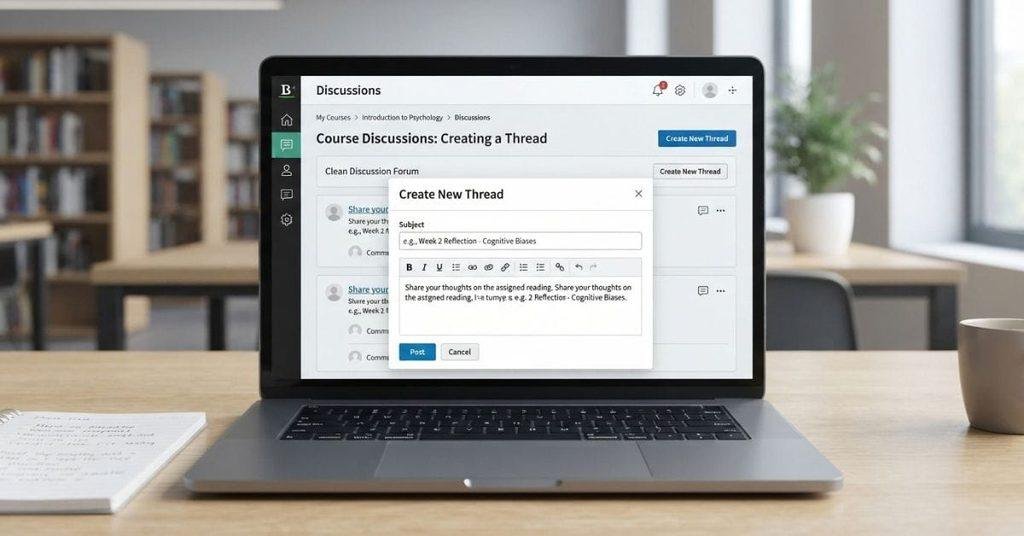
If you need to know how to create a thread in discussion board on Blackboard, start inside your course. The exact menu names can vary between Blackboard Ultra and Blackboard Original. However, the basic process remains similar: open the discussion, create a new thread, write your response, and post it.
Open Your Blackboard Course
Sign in to Blackboard and open the course where you need to post your discussion. Make sure you select the correct course before continuing.
Your instructor may place discussions under Discussions, Course Content, or another course menu area. If you cannot find the discussion, check the weekly module or assignment instructions.
Open the Discussions or Discussion Board Area
In Blackboard Ultra, look for Discussions in the course navigation. Select it to view the discussions available in your course.
Blackboard Original may use a Discussion Board link instead. Your instructor can also place a discussion link inside a specific content area.
Find the Required Discussion
Review the available discussions and select the one assigned by your instructor. Read the instructions before creating your thread.
Check for requirements such as word count, due dates, sources, or required questions. Some discussions may also require you to respond to classmates.
Select the Option to Create a New Thread
Once you open the discussion, look for an option such as Create Thread, Start a New Thread, or New Discussion.
The wording depends on your Blackboard version and course setup. Select the option that lets you create a new discussion post.
Enter Your Discussion Subject
Enter a short and descriptive subject for your thread. Your instructor may provide a specific format for discussion titles.
For example, you could use the assigned topic followed by your name or discussion number. Follow your instructor’s directions if they provide a required format.
Write Your Discussion Post
Enter your response in the main text editor. Answer the instructor’s question directly and follow all assignment requirements.
Use clear paragraphs and support your ideas when the instructions require examples or sources. Before posting, review your response for grammar, formatting, and completeness.
Pro Tip: Keep the discussion question visible while writing. This helps you address every part of the prompt instead of answering only the first question.
Add an Attachment if Required
If your instructor requires a file, image, document, or other attachment, use the attachment option in the discussion editor.
Choose the correct file from your device and wait for it to finish uploading. Check that the attachment appears before submitting your thread.
Do not attach extra files unless your instructor allows them. Unsupported or incorrect files may prevent your submission from meeting the assignment requirements.
Submit or Post Your Thread
Review your subject, response, and attachments one final time. Then select Post, Submit, Save, or the equivalent button shown by your Blackboard course.
After posting, confirm that your thread appears in the discussion. If your course uses post-first requirements, you may need to publish your own thread before viewing classmates’ responses.
Following these steps will help you understand how to create a thread in Blackboard and submit your discussion correctly.
How to Create a Thread in the Discussion Board on Blackboard
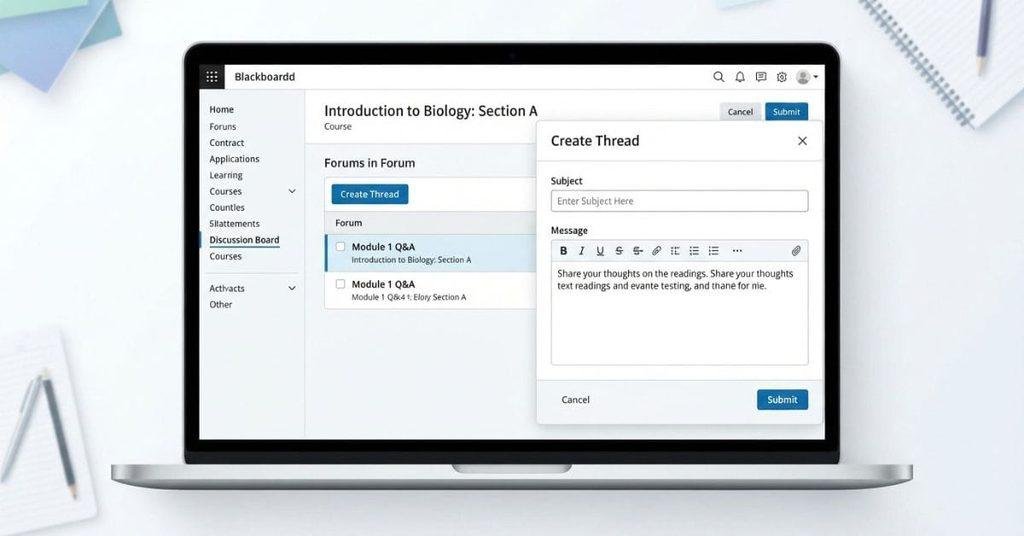
If you’re searching how to create a thread in the discussion board on Blackboard, the process follows a simple sequence. Start by opening your course and locating the Discussions or Discussion Board area.
Select the discussion assigned by your instructor. Then choose the option to create a New Thread or start a new post. Enter your subject and write your response in the text editor.
Before posting, check the discussion instructions for required word counts, sources, or response guidelines. If attachments are allowed, add any required files before submitting.
Finally, select Post, Submit, or the available button shown in your course. Blackboard may use different labels depending on the version and course settings.
Quick path:
Course → Discussions/Discussion Board → Discussion → New Thread → Write Post → Submit/Post
This workflow covers the basic process without requiring you to navigate through unrelated course areas.
How to Create a Thread on Blackboard Ultra
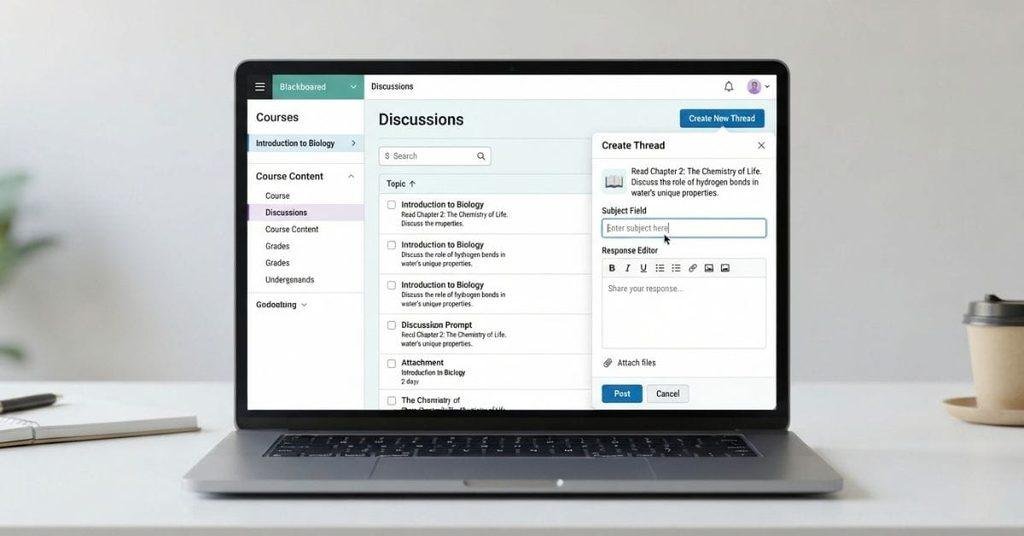
Blackboard Ultra uses a streamlined course layout, but discussion settings can differ between courses. To learn how to create a thread on Blackboard Ultra, start by opening Courses and selecting the appropriate course.
From the course page, open Discussions. Find the discussion your instructor assigned and select it. Look for the available option to create or post a new thread.
Write your response in the discussion editor and follow the instructions provided by your instructor. If the discussion permits attachments, add the required file using the available attachment option.
Review your post before submitting it. Then select Post, Submit, or the relevant posting option displayed in your course.
Pro Tip
Don’t assume every Blackboard Ultra discussion will look identical. Instructors can configure discussions with different settings, requirements, and posting options.
If you don’t see a New Thread option, read the discussion instructions first. Your instructor may have configured the activity differently or may use another posting workflow.
How to Create a Thread on Blackboard Original
Blackboard Original uses the traditional Discussion Board layout, so its interface can look different from Blackboard Ultra. The names and locations of buttons may also vary by course.
To create a thread, open your course and select Discussion Board from the course menu. Then choose the required Forum and select Create Thread.
Enter your subject and write your discussion response in the editor. Add an attachment if your instructor requires one and the forum allows attachments.
Review your post, then select Submit to publish the thread.
Quick path:
Course → Discussion Board → Forum → Create Thread → Write → Submit
If you don’t see these options, check your course instructions. Your instructor may have configured the forum differently.
What Is a Discussion Thread on Blackboard?
A discussion thread on Blackboard is a student’s post within a specific discussion topic or forum. Understanding this difference makes Blackboard discussions easier to navigate.
A discussion area contains the topic or question your instructor wants students to discuss. You create a thread when you post your own response to that topic.
Depending on the discussion settings, other students may be able to open your thread and reply to it. These replies can create a conversation around your original post.
The instructor controls how each discussion works. They may require an original thread, replies to classmates, attachments, or specific response guidelines.
Think of the structure like this:
- Discussion area: Where the class discussion takes place.
- Discussion topic: The question or subject students must address.
- Thread: Your individual discussion post.
- Reply: A response to an existing thread.
This structure helps you understand where to create your post and where to respond to classmates.
What Should You Write in a Blackboard Discussion Thread?
Your Blackboard discussion thread should directly answer the prompt and follow your instructor’s specific requirements. You don’t need to write a long essay unless the assignment asks for one.
Read the Discussion Prompt
Start by reading the complete discussion prompt before writing. Identify the main question and any instructions about examples, sources, or required responses.
Check whether your instructor asks you to address a specific reading, concept, scenario, or question.
Answer Every Required Part
Break the prompt into its required parts before you start writing. Make sure your response addresses each question or instruction.
If the prompt contains multiple questions, don’t answer only the first one. A simple checklist can help you avoid missing a required part.
Use Your Own Words
Write your response in your own words and explain the topic clearly. Avoid copying sentences directly from course materials or websites.
If you use someone else’s exact words, follow your instructor’s citation requirements. Your discussion should show your own understanding of the assigned topic.
Support Claims When Sources Are Required
Some Blackboard discussions require students to use textbooks, articles, or other sources. When sources are required, follow the citation style and source rules provided by your instructor.
Don’t add sources simply to make a short discussion look more academic. Focus on the requirements of the specific assignment.
Follow the Word Count
Check the required word count before posting your thread. Some instructors set minimum or maximum limits for discussion responses.
Write enough to answer the prompt properly without adding unrelated information.
Review Before Posting
Read your thread once before selecting Post or Submit. Check that you answered every required part and included any requested sources or attachments.
Also check basic spelling, formatting, and clarity. A quick review can catch missing details before your post becomes visible.
How to Reply to a Discussion Thread on Blackboard
Replying to an existing Blackboard thread usually takes fewer steps than creating a new one. First, open the relevant Discussion and select the thread you want to answer.
Look for the Reply option below the existing post. Select it, write your response, and follow any instructions about length or content.
When your response is ready, select Post or Submit, depending on your Blackboard version and course settings.
Quick path:
Open Discussion → Select Thread → Reply → Write Response → Post
Remember that instructors can configure discussions differently. The available reply options may therefore vary between courses.
How to Edit a Discussion Thread on Blackboard
Blackboard may allow you to edit a discussion thread after posting, but this depends on your course settings. Your instructor or institution can control which discussion actions students can use.
To check whether you can edit your post, open the relevant discussion and find the thread you created. Open your post and look for an Edit option in the available menu.
If Edit appears, select it and make the necessary changes. Review your updated response, then select Save, Update, or the available confirmation button.
If you don’t see an editing option, Blackboard may not allow changes after posting. Avoid creating a second thread unless your instructor permits it.
Pro Tip
Check your discussion instructions before editing a submitted post. Some instructors may have specific rules about changing responses after submission.
How to Delete a Discussion Thread on Blackboard
Blackboard doesn’t always give students permission to delete their own discussion threads. Whether you can remove a post depends on the discussion configuration and permissions set by your instructor.
To check, open the discussion and find your existing thread. Open the available post menu and look for a Delete option.
If Delete appears, follow the confirmation steps shown by Blackboard. Make sure you want to remove the thread before confirming.
If you don’t see a delete option, don’t assume something is wrong with your account. Your instructor may have disabled student deletion.
If you need a post removed but cannot delete it yourself, contact your instructor and explain what needs to be changed.
Why Can’t I Create a Thread on Blackboard?
If you can’t create a new thread, the issue may come from the discussion settings rather than your Blackboard account. Check the discussion details and course instructions before trying again.
Common reasons include:
- The discussion has not opened yet: Your instructor may have set a future start date.
- The deadline has passed: The discussion may no longer accept new threads.
- New threads are disabled: Your instructor may have configured the discussion to allow replies only.
- You’re viewing the wrong discussion: Check the assigned topic and course module carefully.
- Another action is required first: Some discussions may require you to complete another step before posting.
- Course permissions or settings: Your available options depend on how the instructor configured the discussion.
- A technical issue: A temporary browser or Blackboard problem can sometimes affect available controls.
If everything looks correct but you still can’t create a thread, refresh Blackboard and try again. You can also try another supported browser or device.
If the Create Thread option remains unavailable, contact your instructor or school support team. They can check the discussion settings and your course access.
Why Can’t I See the Discussion Board on Blackboard?
Not seeing a Discussion Board doesn’t necessarily mean your Blackboard course has a problem. Your course layout and discussion settings determine where discussions appear.
Your instructor may not have enabled or added a discussion activity yet. The discussion may also appear inside Course Content, a weekly module, or another course area instead of a dedicated Discussion Board link.
Blackboard Ultra and Original also organize discussions differently. Ultra commonly provides a Discussions area, while Original courses traditionally use the Discussion Board.
The course may also contain no currently available discussions. A discussion can be hidden or unavailable based on instructor settings, dates, or other course conditions.
If you can’t find the assigned discussion, check your course announcements and weekly content first. If the assignment still doesn’t appear, ask your instructor where to access it.
Can Students Create Their Own Discussion Threads on Blackboard?
Yes, students can create their own discussion threads in some Blackboard courses. However, this depends on how the instructor configured the discussion.
Some discussions allow students to start new threads and choose their own subject. Other discussions may focus on an instructor-created topic where students respond directly to the provided prompt.
Your available options can also vary between Blackboard Ultra and Blackboard Original. If you don’t see a New Thread or similar option, check the discussion instructions before assuming there’s an issue.
If the assignment asks for an original post, look for instructions explaining where and how to submit it. If you’re expected to reply to an existing topic, select the required thread and use the Reply option instead.
If your Blackboard discussion is graded, your discussion score can contribute to your overall course grade. You can use our Blackboard Grade Calculator to estimate how that score may affect your current course grade.
Conclusion
Creating a Blackboard discussion thread is straightforward once you know where to find the correct discussion.
We covered how to create a thread in discussion board on Blackboard, including Blackboard Ultra and Original. You also learned how to write your post, add attachments, reply to threads, and troubleshoot common issues.
Remember that Blackboard options can vary because instructors control discussion settings. If you don’t see a New Thread or Reply option, check the discussion instructions first.
For graded discussions, you can also use our Blackboard Grade Calculator to estimate how your score may affect your course grade.
Ready to post? Open your course, find the assigned discussion, and follow the required steps. Explore more Blackboard guides on our website for additional help.
Frequently Asked Questions

We are the Canvas Academic Team, a developer team focused on building simple and practical tools that help students succeed academically. This platform was created specifically for Canvas LMS students to make grade tracking, GPA calculations, exam planning, and academic management easier and more efficient.
Our focus is on creating fast, accurate, and student-friendly educational tools along with helpful learning resources that improve productivity and reduce academic stress.
Through CanvasGradeCalculator.com, our goal is to continue building useful resources that help students study smarter, stay organized, and achieve better academic results.